
Legends of the Engine Compartment
Part 5
September 4, 2002
Before moving on to the latest garage hijinks, I want to re-post some information Louis C. Armer, Jr. (a/k/a The Chuckster) gave me about polishing metal, the subject of my last misadventure. I did post this message earlier, so I apologize for the 3/8th of an inch of wasted bandwidth (the approximate height of these letters on my screen):
"On your buffing: they make extension mandrels which will take your buffing wheel farther away from your motor and allow more room for large objects.
"Once you buff any of the linkage, you can coat with a clear Plastikote type product...they even make clear satin now so you have a choice.
"Do not try to clear coat any of the sill plates or other aluminium as it will turn cloudy or yellow. On your aluminium sill plates there is/was a anodized surface coat which you have removed and now to keep it shiny you will have to keep it polished or reanodize which is expensive. It is best to use a aluminium specific polish like "Mothers" or "Mequiars" as they have something in the polish that helps combat the aluminium oxide that wants to turn the surface to that satin look.
"Remember your wheel surrounds and rocker panel pieces are also aluminum.
"All the window surrounds are stainless steel and usually require block sanding with wet/dry sandpaper before you buff. To buff the stainless you need to have the white conpound ( trippoli ) and then follow with the rouge (red/maroon) When prepping your stainless start with 500/600 grit/ follow with 800/900 / finish with 1200/1600 and then see if you need trippoli first or if you can follow up with just rouge. Use water when you use the sandpaper and use a wooden or rubber block when the surface allows it. Be VERY careful with the stainless as it can cut and injure you if you are holding it wrong when buffing. Approach initially at a diagonal and when you feel confortable attempt to buff straight on.
"DO NOT USE THE SAME WHEEL FOR TRIPPOLI AND ROUGE AS TRIPPOLI IS LIKE WHITE COMPOUND AND IS VERY AGGRESSIVE.
"Finally, be extremely careful when attempting to buff ANY chrome as you will eat right through the surface if you stay in one place too long or create too much heat. Also you must remember that all of the chromed pot metal pieces were fragile when new and are now 36/37 years old.
"My qualifications??? Complete restoration of Darth Vair and 35 years of jewelry engraving with much of the engraving on plated pieces or gold-filled or rhodium plated sterling silver. I always told folks, when I was in retail, that I couldn't afford to make mistakes because I didn't have an eraser."
Thanks, Chuck.
Last night was not intended to be a full-blown "Legends" night (in the halycon Witte garage, towering in Olympian stature over the playset), but we kinda got carried away.
Accompanying on percussion, as usual, was my lovely assistant, Jeff.
First order of business was to install the hood insulation pad. Next we put on the new lower cove molding from Clarks that came yesterday. Very nice, with new hardware. The shipment from Clarks also included new bumper bolts, so we got started on transferring the brackets from one bumper to the next. Who needs PB Blaster when you can just BREAK the old bolts? It makes us feel manly, y'know.
In between fiddling with the bumper bolts I wadded up the new insulation pads for the quarterpanels and stuffed them in where I think they are supposed to go. I think I am going to get some 3M spray adhesive for the inside tops of the quarterpanels and the wheelhouses, so the pads don't slide all over creation.
Nothing beats having fiberglass all over your arms.
We cleaned up the inside bumper bolts and attached bumper to car.
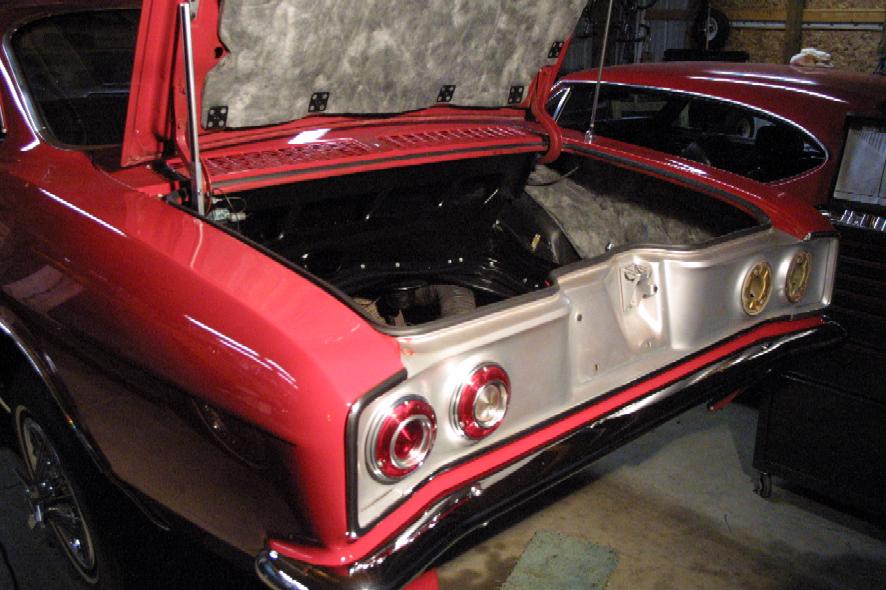
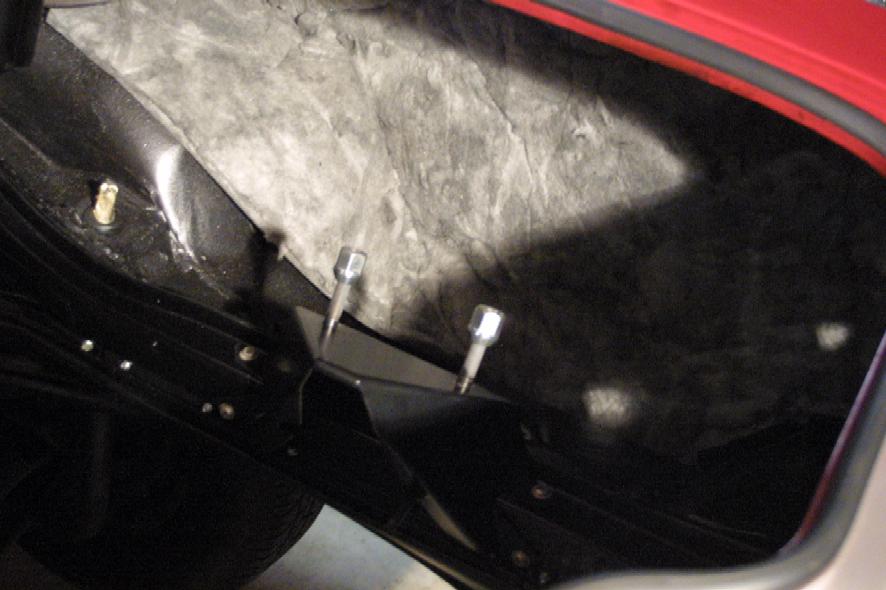
While we were at it, we also reattached the spare tire carrier, now freshly powdercoated.
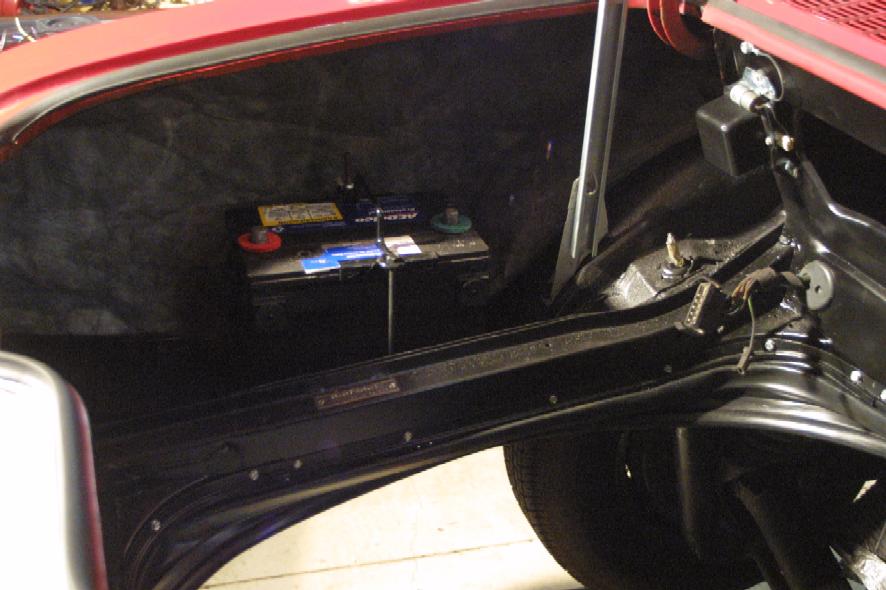
I also installed the new little rubber drain tubes that go in the plenum. Never even knew they were there! Finally, I turned the battery around so that it NOW FACES THE CORRECT DIRECTION.
Things are getting a mite dusty in yonder engine compartment, so I think I want to tidy up a bit before we move ahead.
***
I stopped at my friendly neighborhood NAPA store where they had SEAFOAM (TM) products on the shelf. I bought some of the engine cleaner and Trans Tune, and can't wait to dump it in my '92 Custom Cruiser with 180,000 miles. I'll report back. If it blows up the car, I'm sure Hank can find me a nice, rust-free replacement down there in the Queen City. (GGG)
I got a call from a friend who wanted to just get rid of a 1992 Grand Am the motor of which was apparently making considerable smoke. So I called another friend, and told him that if I could have the aluminum drums from one of his three or four early '80s Firebirds, the car was his. Labor Day I helped load the Grand Am and received a set of drums. Next step will be to blast them and have them turned. Stay tuned.
All images and text copyright Norman C. Witte 2002.